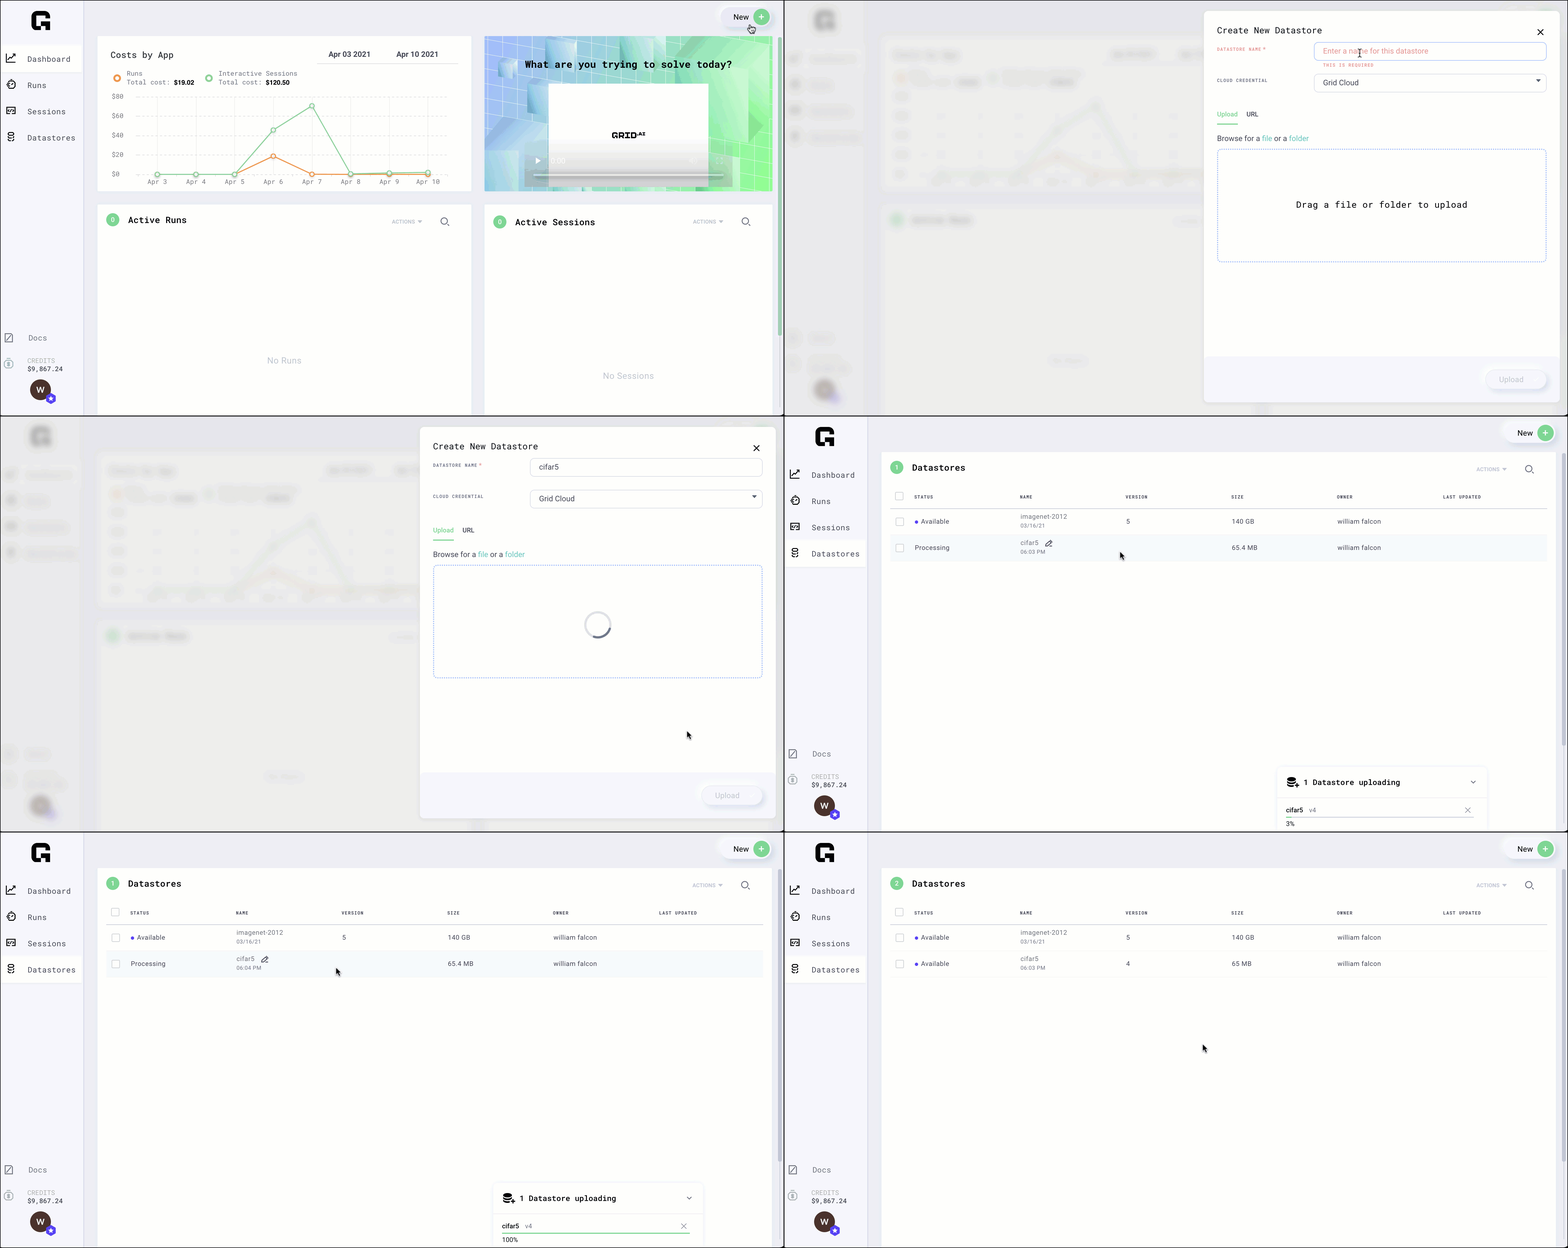
Create Datastores
Datastores can be created from a local filesystem, HTTP URL, and S3 Bucket.
Uploading Files from a Computer
Small datasets
You can use the UI to create Datastores for datasets smaller than 1GB (files or folder). We have noticed that when the Datastore sizes are 1GB+ you start to hit the browser limit for uploading data. In such situations we advise using the CLI to create Datastores.
Select the file or folder and click upload.

note
You can also use the CLI for uploading these datastores!
Large datasets (1 GB+)
For datasets larger than 1 GB, use the CLI.
note
We suggest starting an Interactive Session and creating your Datastore from there in the following instances:
- Your dataset is larger than 1GB
- You do not have a strong internet connection
Using an Interactive Session in this scenario will improve your upload speed.
First, install the grid CLI and login:
pip install lightning-grid --upgrade
grid login
Next, use the Datastores command to upload any folder:
grid datastore create --name imagenet ./imagenet_folder/
This method can work from:
- A laptop.
- An interactive session.
- Any machine with an internet connection and Grid installed.
- A corporate cluster.
- An academic cluster.
Creating Datastores from an S3 Bucket
Create From a Public S3 Bucket
Any public AWS S3 bucket can be used to create datastores on the grid public cloud or on a BYOC cluster by using the grid CLI or UI.
Using the UI
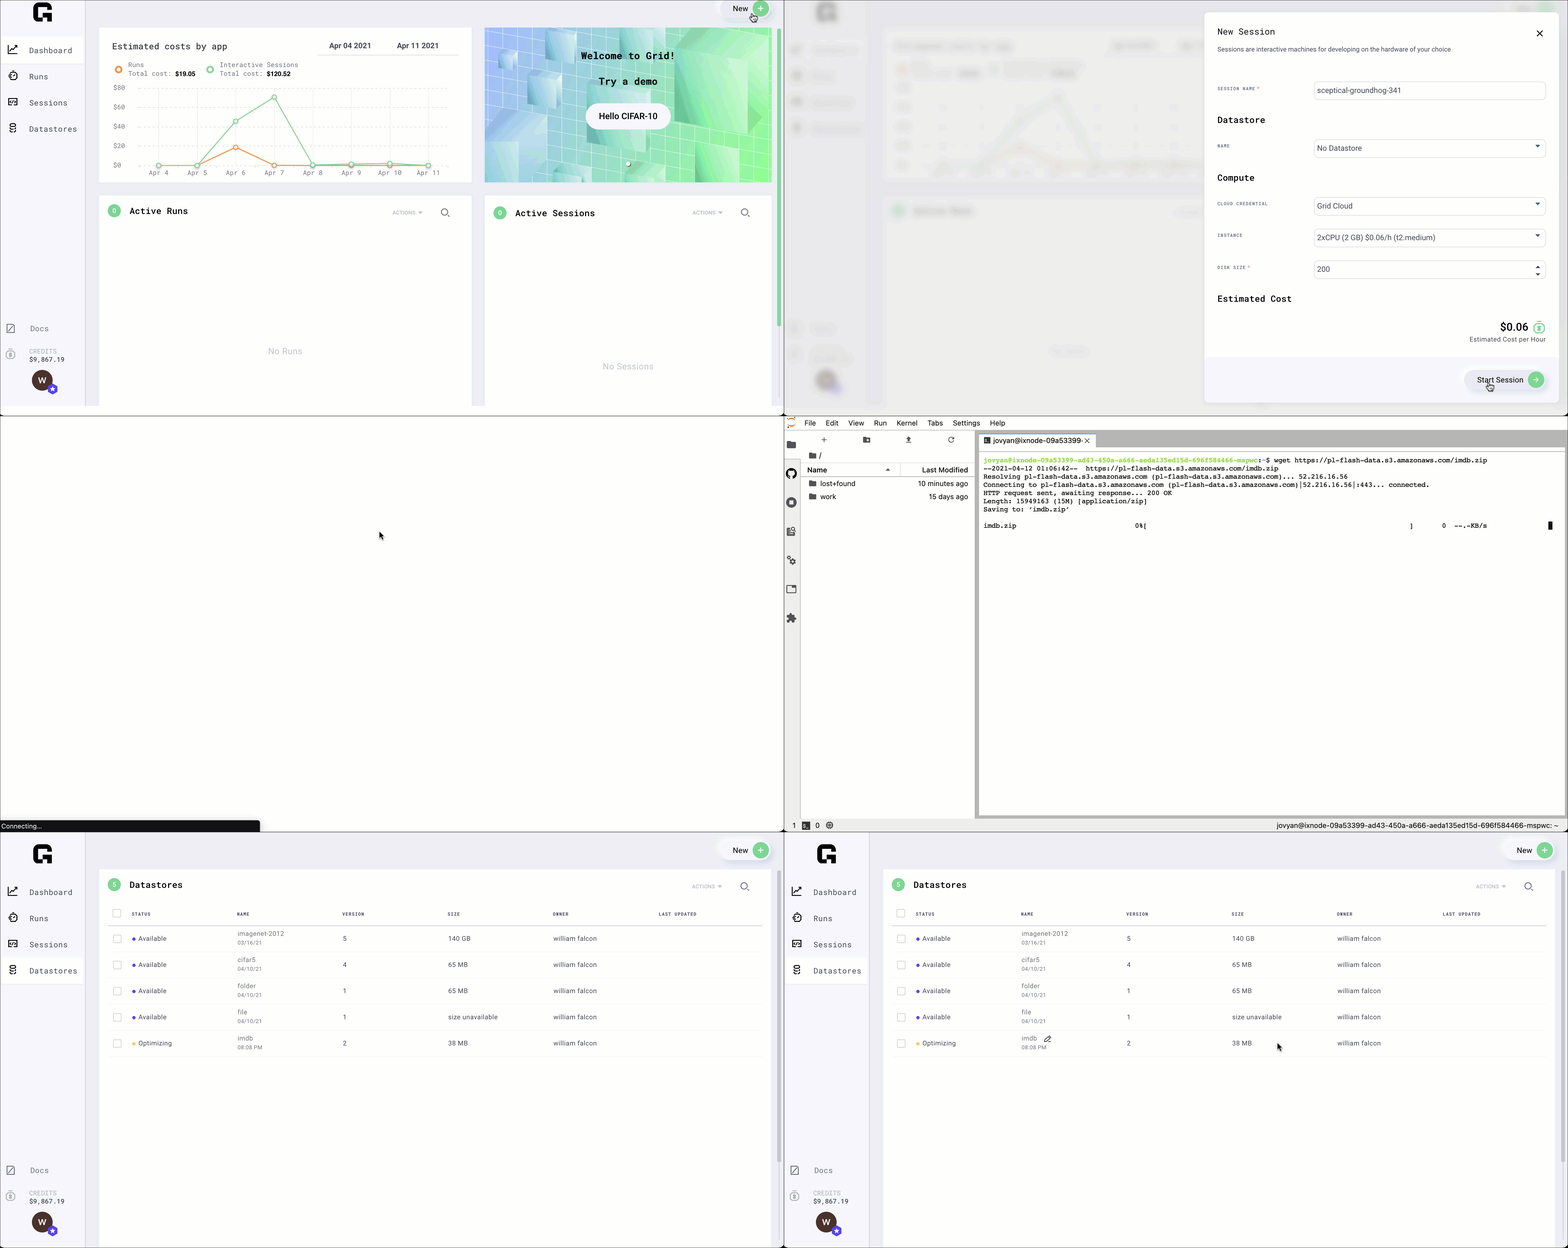
Click New --> Datastore and choose "URL" as the upload mechanism. Provide the S3 bucket URL as the source.
Using the CLI
In order to use the CLI to create a datastore from an S3 bucket, we simply need to pass a
S3 URL in the form s3://<bucket-name>/<any-desired-subpaths>/ to the
grid datastore create command.
For example, to create a datastore from the ryft-public-sample-data/esRedditJson
bucket
we simply execute:
grid datastore create s3://ryft-public-sample-data/esRedditJson/
Which will copy the files from the source bucket into the managed Grid Datastore storage system.
tip
In the above example, you'll see that we omitted the --name option in the CLI command.
When the --name option is omitted, the datastore name is assigned the name of the last
"directory" making up the source path. So in the case above, the datastore would be named
"esredditjson" (the name is converted to all lowercase ASCII non-space characters).
If we we wanted to use a different name, we can override the implicit naming by passing
the --name option / value parameter explicitly. As an example, if we wanted to create a
datastore from this bucket named "lightning-train-data" we could execute:
grid datastore create s3://ryft-public-sample-data/esRedditJson/ --name lightning-train-data
Using the --no-copy option via the CLI
Example:
grid datastore create S3://ruff-public-sample-data/esRedditJson --no-copy
Use --no-copy when you want to avoid creating a duplicate copy of the data in your cluster account. Using this flag can significantly speed up Datastore creation time by preventing the copy process.
info
We recommend that you use this flag when creating a private S3 Datastore within a BYOC cluster.
Also consider using this option when the your dataset size is greater than 500 GB.
If your Datastore was from a public S3 bucket, having a copy in the cluster can be advantageous if someone deletes or modifys the public bucket. --no-copy does not prevent you from deleting the file in S3 as thats managed by the user. If thats done the Datastore will show that the file still exists since the metadata is cached, On access S3 will indicate that the file does not exist anymore.
When using this flag, you cannot remove files from your bucket. If you'd like to add files, please create a new version of the Datastore after you've added files to your bucket.
If you are using this flag via the Grid public cloud, then the source bucket should be in the AWS us-east-1 region or there will be significant latency when you attempt to access the Datastore files in a Run or Session.
Creating Datastore From Private AWS S3 Buckets (BYOC users only)
Grid now supports the ability to create Datastores from private AWS S3 buckets by using
the --no-copy mode via the CLI. In order to allow Grid to access your private buckets,
you'll need to create an authorized AWS Role using the grid credential create --type s3
command (explained in detail below). After creating a role, you can run the
grid datastore create S3://<private-bucket-name-here> --no-copy command as usual - no
modifications needed. If any of your registered s3 credentials can access the s3 bucket
path specified, then Grid will automatically use them when creating the Datastore (and
when using that Datastore in a run or session).
Refer To Page: Credentials for more information.
Create from an HTTP URL
Datastores can be created from a .zip or .tar.gz file accessible at an unauthenticated
HTTP URL. By using an HTTP URL pointing to an archive file as the source of a Grid
Datastore, the platform will automatically kick off a (server-side) process which
downloads the file, extracts the contents, and sets up a datastore file directory
structure matching the extracted contents of the archive.
info
This mechanism of creating a Datastore is the only one which will implicitly process the specified files into a different form / structure than they were originally in. By this, we mean to say that since it's only ever possible to get a single compressed archive file from a URL, we think it's fair to make the assumption that what you actually want is the extracted contents of the archive, not the archive file itself.
Said another way: if you were to upload a .zip or .tar.gz file from your local
computer, or specify an S3 bucket which contained a single archive, we would NOT extract
this file since it's assumed that you are able to process the data into the structure you
actually need before creating the Datastore. If you sent us a .zip file via these
methods, you would get a .zip file in the Datastore mount path.
Using the UI
Click New --> Datastore and choose "URL" as the upload mechanism. Provide the HTTP URL as the source.
From the CLI
In order to use the CLI to create a datastore from an HTTP URL, we simply need to pass a
URL which begins with either http:// or https:// to the grid datastore
create command.
For example, to create a datastore from the the MNIST training set at:
https://datastore-public-bucket-access-test-bucket.s3.amazonaws.com/subfolder/trainingSet.tar.gz
we simply execute:
grid datastore create https://datastore-public-bucket-access-test-bucket.s3.amazonaws.com/subfolder/trainingSet.tar.gz
tip
In the above example, you'll see that we omitted the --name option in the CLI command.
When the --name option is omitted, the datastore name is assigned from the last path
component of the URL (with suffixes stripped). So in the case above, the datastore would be named
"trainingset" (the name is converted to all lowercase ASCII non-space characters).
If we wanted to use a different name, we could override the implicit naming by passing
the --name option explicitly. As an example, if we wanted to create a
datastore from this bucket named "lightning-train-data" we could execute:
grid datastore create https://datastore-public-bucket-access-test-bucket.s3.amazonaws.com/subfolder/trainingSet.tar.gz --name lightning-train-data
Create from a Session
Upload via Interactive Session
For huge datasets that need processing or a lot of manual work, we recommend this flow:
- Launch an Interactive Session
- Download the data
- Process it
- Upload

Screen
When you are in the interactive Session, use the terminal multiplexer
Screen to make sure you don't
interrupt your upload session if your local machine is shut down or experiences network
interruptions.
# start screen (lets you close the tab without killing the process)
screen -S some_name
now do whatever processing you need:
# download, etc...
curl http://a_dataset
unzip a_dataset

# process
do_something
something_else
bash process.sh
...
When you're done, upload to Grid via the CLI (on the Interactive Session):
grid datastore create imagenet_folder --name imagenet
note
Grid CLI is auto-installed on sessions and you are automatically logged in with your Grid credentials.
Create from a Cluster
Upload from a cluster
Use these instructions to upload from:
- A corporate cluster.
- An academic cluster.
First, start screen on the jump node (to run jobs in the background).
screen -S upload
If your jump node allows a memory-intensive process, then skip this step. Otherwise, request an interactive machine. Here's an example using SLURM.
srun --qos=batch --mem-per-cpu=10000 --ntasks=4 --time=12:00:00 --pty bash
Once the job starts, install and log into Grid (get your username and ssh keys from the settings page).
# install
pip install lightning-grid --upgrade

# login
grid login --username YOUR_USERNAME --key YOUR_KEY
Next, use the Datastores command to upload any folder:
grid datastore create ./imagenet_folder/ --name imagenet
You can safely close your SSH connection to the cluster (the screen will keep things running in the background).